
Why I Chose Wide-Field Deep-Sky Astrophotography First
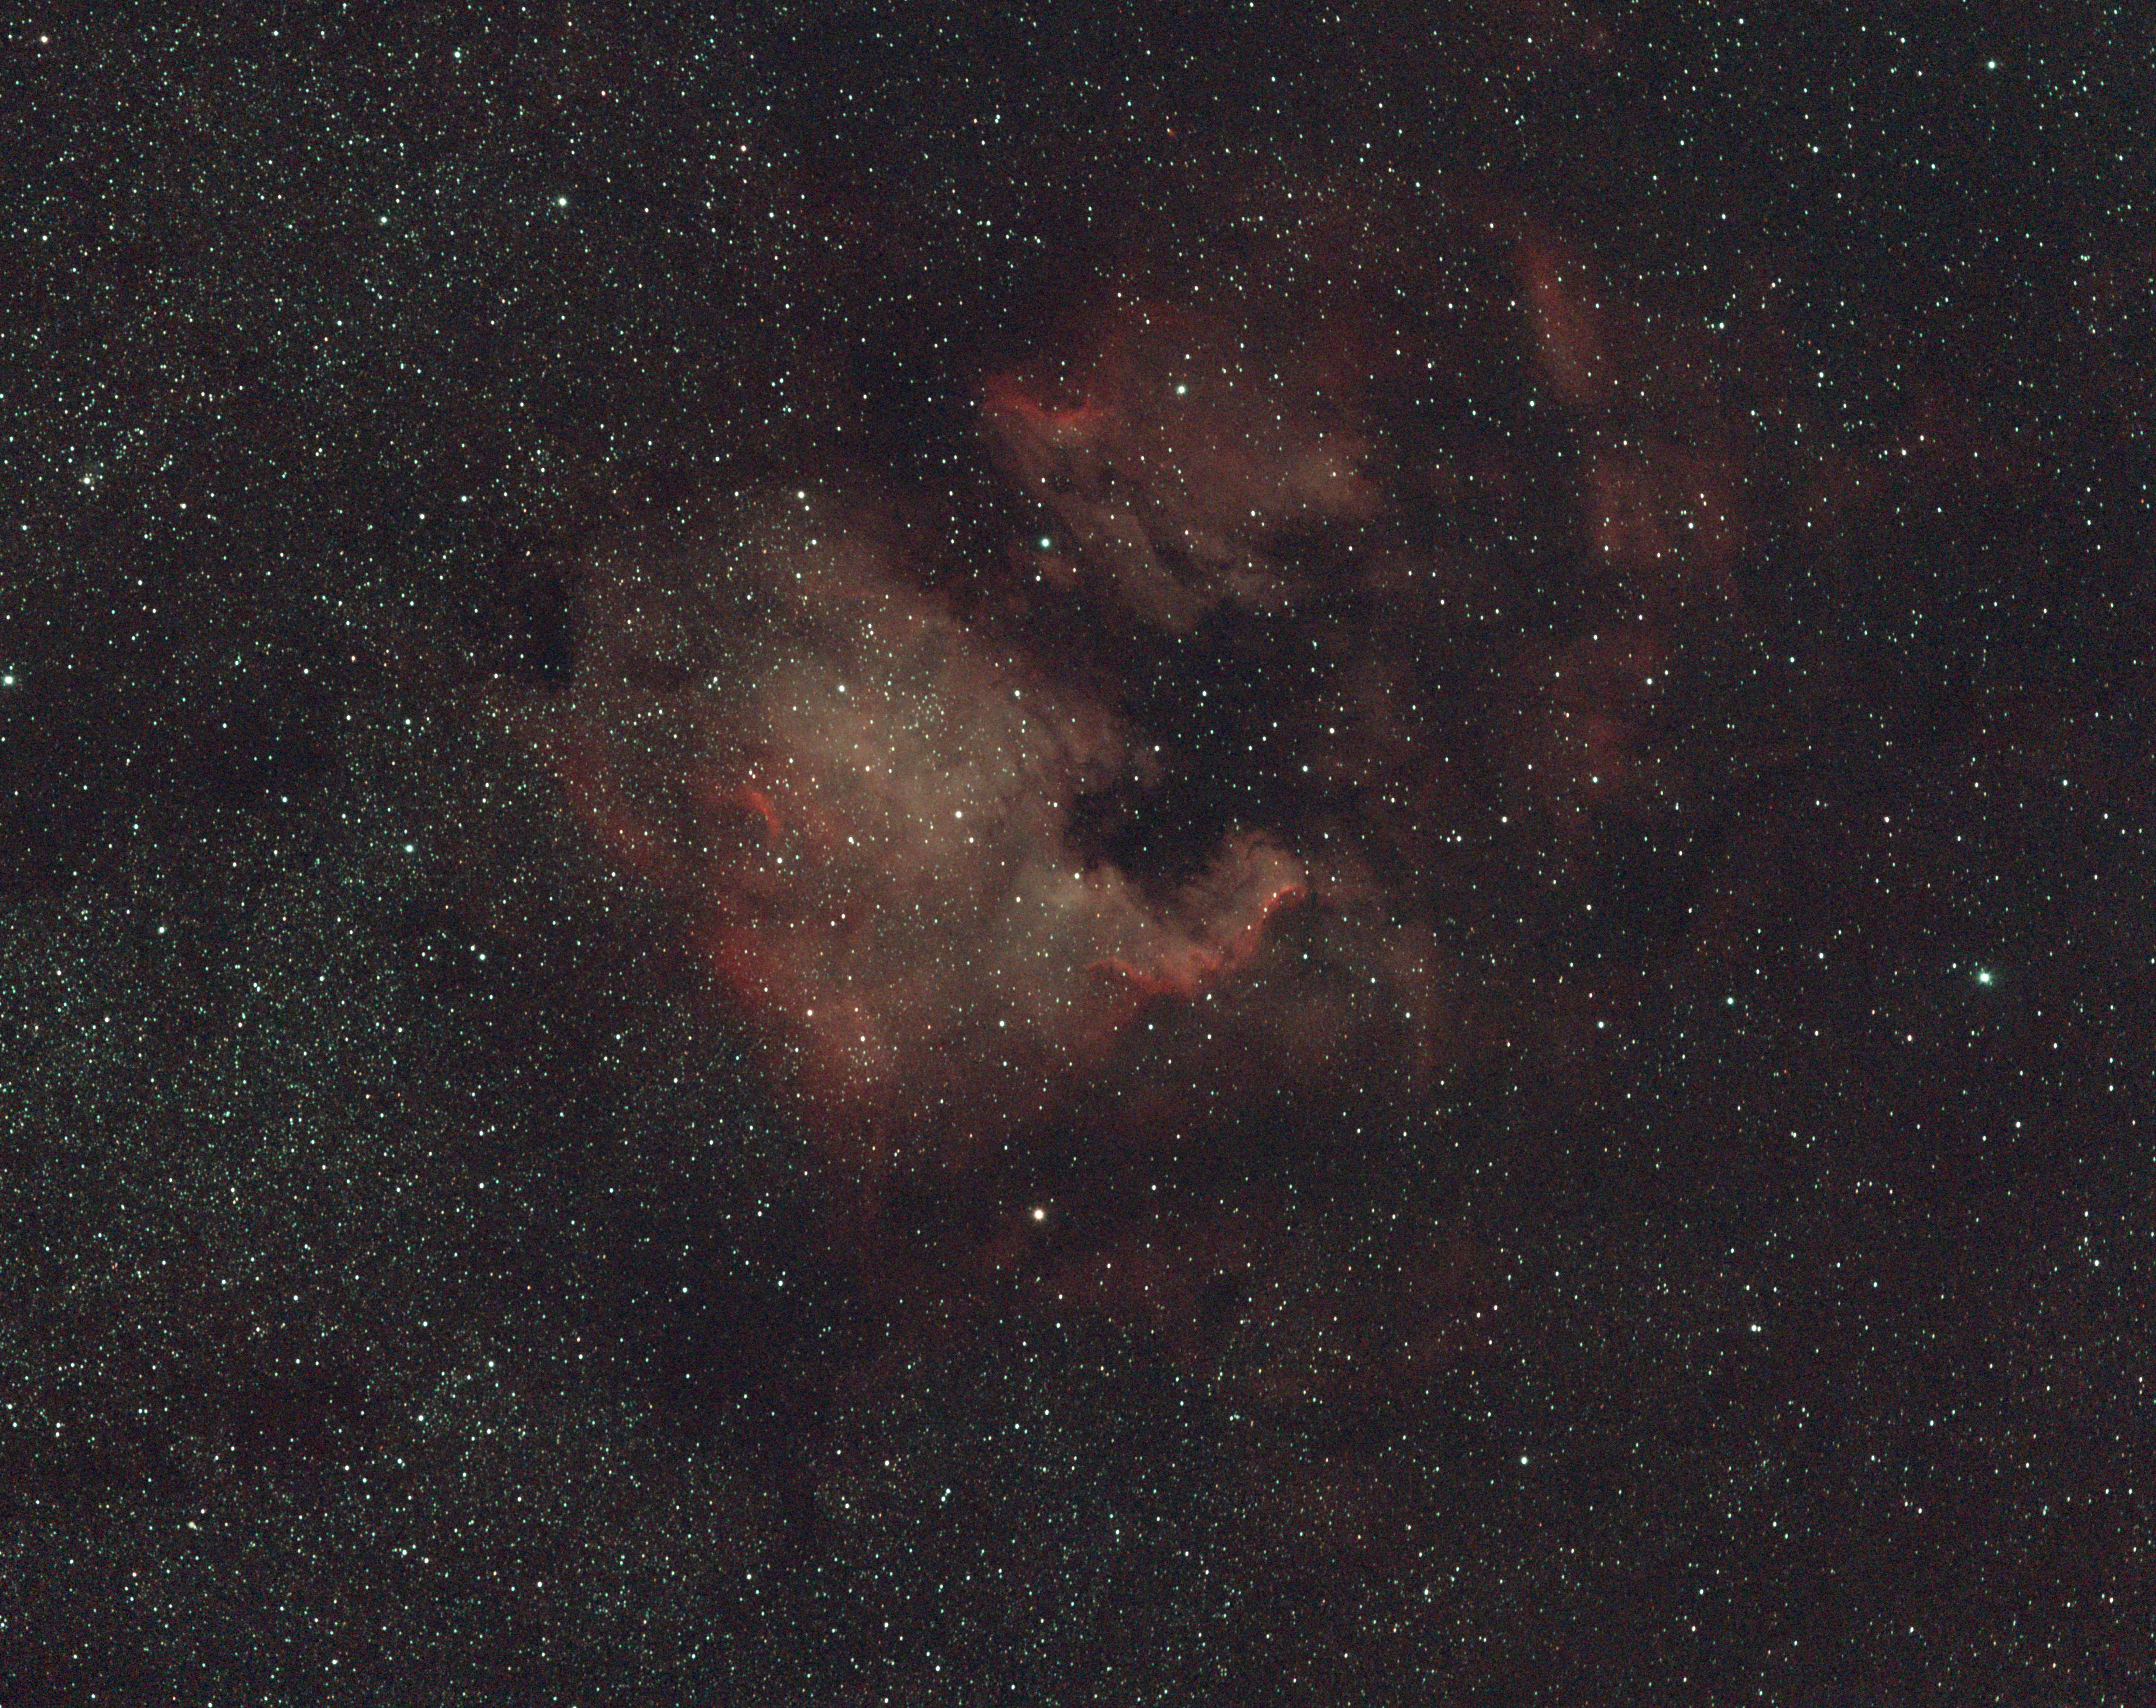
Stop someone on the street and ask them about the moon. They’ll know it. They’ve seen it their whole life, watched it change shape, maybe even pointed a pair of binoculars at it once. Now ask them about the Rosette Nebula, or the Orion Nebula, or anything with “nebula” in the name at all. Most people have no idea these things exist. They’re invisible to the naked eye, hiding in plain sight, and yet a camera on a tripod in your backyard can pull them out of the dark.
That contrast is what pulled me toward deep-sky imaging instead of the moon or the planets. And within deep-sky, I didn’t start by chasing galaxies or tight, detailed targets. I started wide-field. Here’s why.
I started wide-field because it was the lowest-risk way in. I already owned a Sony ZV-E10, so the camera wasn’t going to be a new investment, and the only real gear I had to buy was a Star Adventurer GTi tracker and a lens that could be used for outside astrophotography if needed. Wide-field also gave me more forgiving composition and far less demanding tracking requirements than longer focal lengths, which need much tighter precision to avoid star trails and other issues.
Let’s dive into how that decision actually played out, where it eventually hit a ceiling, and what it taught me about choosing gear that fits the goal instead of chasing the biggest lens you can afford.
Why Deep-Sky Won Over Planets and the Moon
The moon and planets have a head start on your attention. You learn about them in school. You’ve seen photos of Saturn’s rings since you were a kid. There’s already a connection there before you ever pick up a camera.
Deep-sky doesn’t have that built-in familiarity, and that’s exactly what made it exciting. Nebulas aren’t something most people have seen, or even heard of. Capturing one from a backyard, using a consumer camera and a lens that could just as easily shoot everyday photos, felt like uncovering something most people don’t know is there.
I also looked at wide star fields and constellation shots early on, and while they’re beautiful, they felt generic compared to what deep-sky targets offered. Nebulas and deep-sky objects felt like a different level entirely, and that’s the pull that stuck.
Starting Wide: Cost, Forgiveness, and Low Risk
Once deep-sky was the target, the next question was how to get there without overcommitting. This is where wide-field made sense, and it wasn’t really a creative decision so much as a practical one.
I already had the ZV-E10. If astrophotography didn’t stick, that camera still had a life outside of it. The only thing I bought specifically for this hobby was the Star Adventurer GTi, which meant my actual financial risk was small. Even the lens purchase of the Rokinon 135mm telephoto lens could be used outside of astrophotography if needed.
Wide-field also happens to be the more forgiving place to start on a technical level. Shorter focal lengths give you more breathing room in your composition, so small framing mistakes or slight tracking drift don’t ruin the shot the way they would at a longer focal length. Longer glass demands tighter tracking accuracy, because any error gets magnified along with the image. Starting wide meant I could make mistakes, and I made plenty, without them being fatal to the session.
When Wide-Field Wasn’t Enough
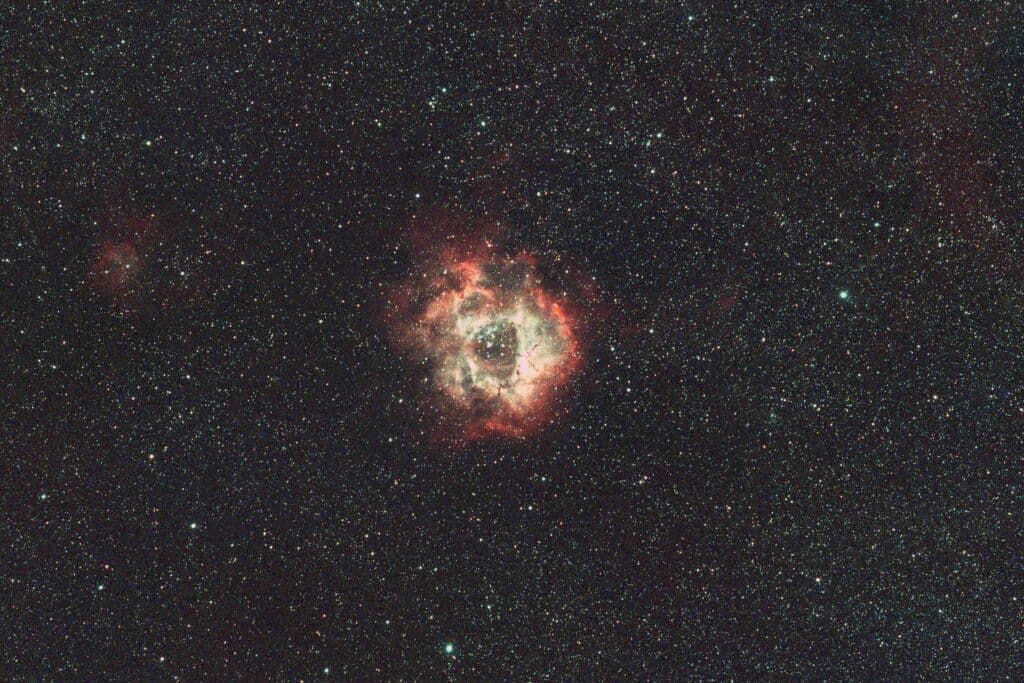
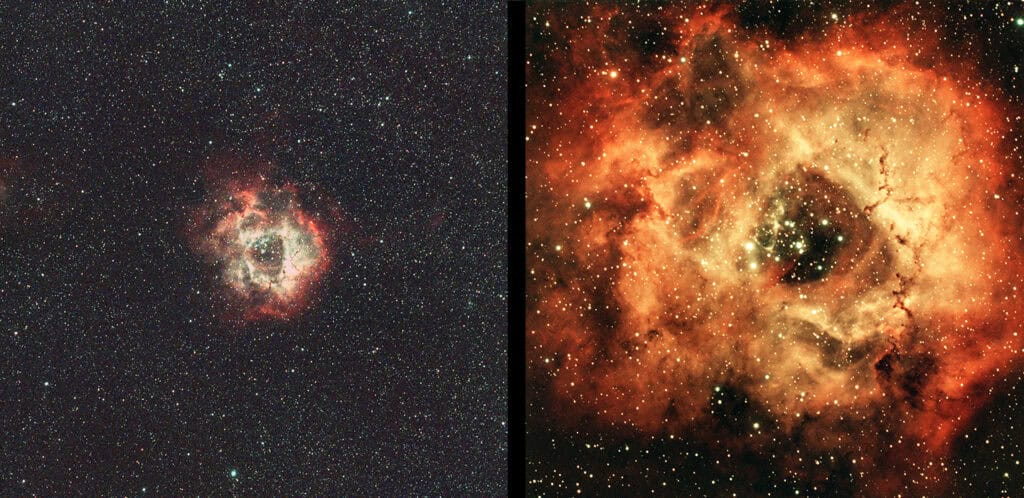
Wide-field is forgiving, but it has a ceiling, and I found mine trying to image galaxies. The 135mm lens simply couldn’t get close enough. Even with larger, brighter targets like the Rosette Nebula, I could see the overall structure and shape, but the fine detail wasn’t there.
That gap is what pushed me toward a longer focal length, moving from the Rokinon 135mm to the SVBONY SV503, a 70mm refractor at roughly 475mm. The difference showed up immediately in side-by-side comparisons of the Rosette Nebula shot with each setup, though it’s worth noting my camera changed at the same time, so the comparison isn’t purely focal length in isolation. Even so, the shift in what the image shows is clear. The wide shot gives you a frame of reference of the surrounding stars as a total composition. The longer focal length gives you the structure inside that nebula, and the image is simply the Rosette Nebula. Since then, I’ve moved even further, adding a SVBONY MK127 at around 980mm with a reducer, specifically to get closer to smaller targets like galaxies.
That same 475mm ceiling showed up again later, this time with galaxies instead of nebulas. I ran into that exact frustration during galaxy season, and worked through how I decided what to upgrade next in How to Know What Astrophotography Gear to Upgrade Next.
Choosing Focal Length Like a Wrench, Not a Ladder
If you’re standing where I was, deciding what to image first, the honest answer is: don’t rush into gear you can’t afford. Getting outside and actually capturing data matters more than what focal length you’re shooting at. That’s how you practice setup, composition, camera settings, and processing, and none of that comes from reading about gear. It comes from doing the Astrophotography Session Workflow: Start to Finish over and over.
The signal to move to a longer focal length isn’t a timeline, it’s a feeling. You’ll know it when you want more detail than your current setup can give you, or when you want a small object like a galaxy or planetary nebula to actually fill the frame. But it can go the other way too. If you’re dealing with tracking issues, or you want to fit a larger object or multiple targets in one shot, a shorter focal length might be the better tool, even after you’ve upgraded.
That’s the real mindset shift. Focal length is a tool that matches your situation, not a ladder you’re supposed to climb. A longer focal length isn’t inherently better, it’s just better suited to certain jobs, and it demands more from the rest of your rig to pull it off. More focal length means more required tracking accuracy and more required guiding precision. The whole setup has to scale together, or you’ll fight your gear more than you image with it. If your budget doesn’t support that yet, that’s a real constraint worth respecting, not something to work around by buying gear you can’t fully use. For more on how to prioritize spending at each stage, this ties directly into What to Focus On at Every Astrophotography Budget From $500 to $2000.
Gear Doesn’t Matter, The Fit Does
None of this was about wide-field being objectively better than any other approach. It was about choosing gear that suited what I actually wanted to do, at the stage I was at, with the money I had to spend.
If you’re deciding where to start, look at other people’s images before you look at gear lists. Find the targets that genuinely excite you. That excitement is what keeps you outside on a clear night instead of finding a reason to stay in. The gear question sorts itself out once you know what you’re chasing, and consistency is really what determines what makes an astrophotography session actually succeed.
Final Thoughts
Wide-field deep-sky wasn’t the “right” starting point because it’s the right starting point for everyone. It was right for me because it matched my budget, my risk tolerance, and my curiosity at the time. The bigger lesson isn’t which focal length to buy first. It’s that the path that gets you outside and imaging consistently is the right one, whatever that path happens to look like for you.
Tagged
In This Post
Current Setup
Equipment links are affiliate links – they help support this site at no cost to you.