
Polar Alignment Without Polaris: How Plate Solving Gets It Done
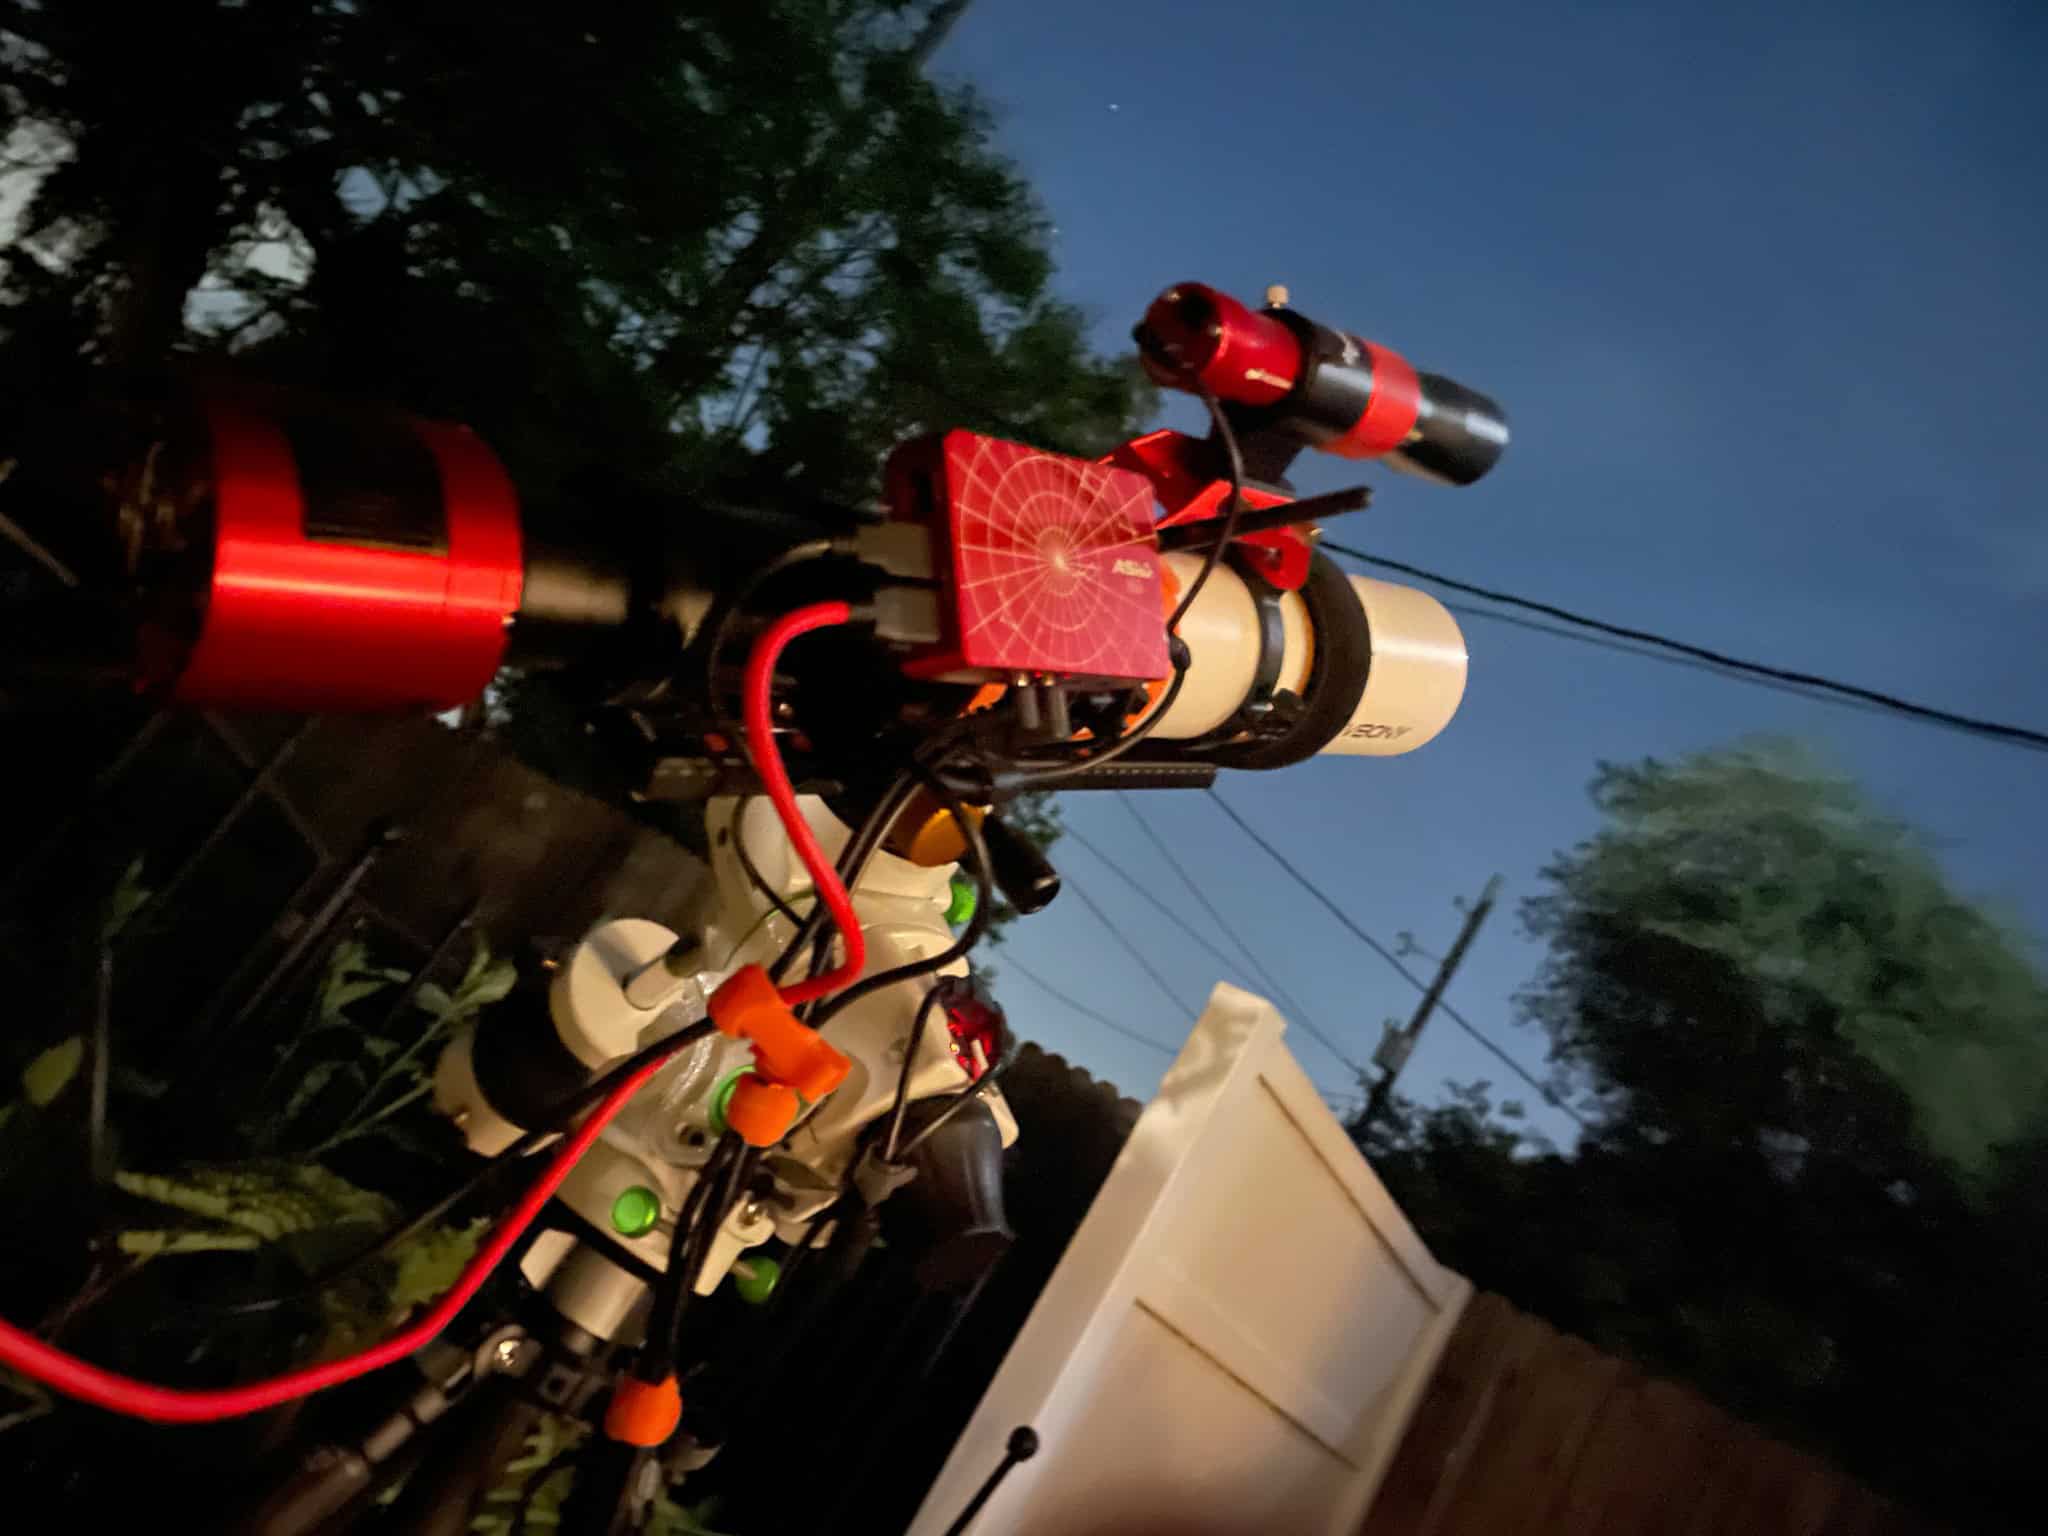
I almost didn’t start astrophotography because of one star.
Every beginner resource I found said the same thing — to polar align your mount, you need to find Polaris, center it in your polar scope, and dial it in. Simple enough advice if you have a clear view of the northern sky. I don’t. Trees block my entire north view. When I realized that, I started weighing options that would have killed the hobby before it started: hauling my rig onto the roof, driving to open fields, or just accepting that maybe this wasn’t going to work from home.
None of that turned out to be necessary.
You do not need to see Polaris to polar align. Plate-solving polar alignment lets you point at any open patch of sky and does the math for you. If you have an obstructed north view — trees, buildings, a neighbor’s house — you can still achieve accurate polar alignment and image successfully.
Let’s dive into how it works and why it changed everything for me.
Why Beginners Think Polaris Is Required
It starts with the name. “Polar” alignment. The North “Pole” Star. Every mental connection points you toward Polaris, and most beginner guides reinforce it. If you’re using a non-go-to mount with a built-in polar scope, that advice is accurate — centering Polaris is exactly what you do.
The problem is that this gets presented as the method, not a method. Beginners absorb it as a hard requirement. If you can’t see Polaris, you can’t polar align. If you can’t polar align, you can’t image. And if you’re standing in your yard staring at a treeline where north should be, that logic feels pretty airtight.
It’s not bad advice. It’s just incomplete. And for anyone imaging from a constrained location — which is a lot of us — that gap in the conversation can feel like a closed door.
How Plate-Solving Polar Alignment Works
Plate solving is a process where software photographs a section of sky, identifies the stars in the frame, and calculates exactly where your rig is pointing. When applied to polar alignment, that capability replaces the need to visually locate any specific star — including Polaris.
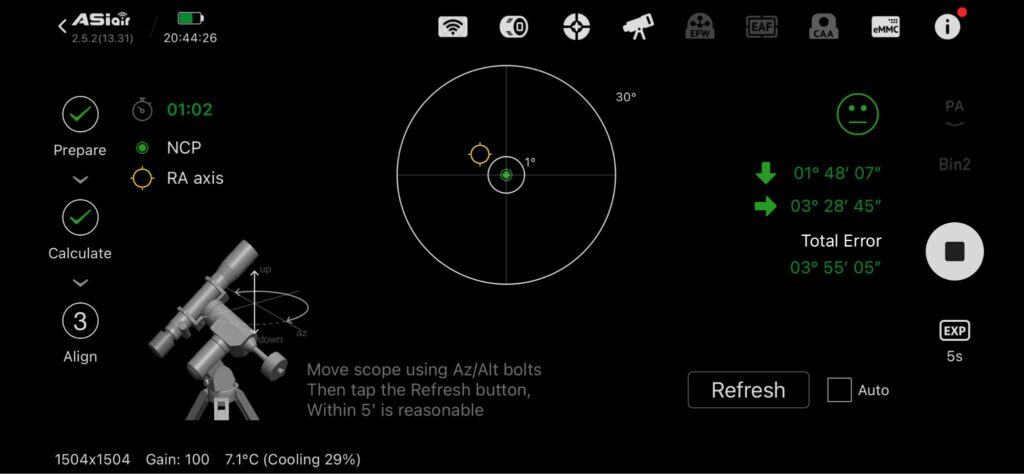
Here’s what the process looks like on my setup using the ASIAir Plus, though other platforms offer similar functionality.
The rig goes out and powers on. I rotate to an open section of sky — any direction works as long as I avoid pointing due east or due west, where the math gets less reliable. I also keep the scope from pointing too high. Aiming steep can cause a meridian crossing after the final alignment image, which throws off accuracy.
One thing worth mentioning before starting: if you’re using a narrowband filter like a dual-pass, pull it off for this step. Narrowband filters limit the number of visible stars, which can make plate solving struggle or fail entirely. A broadband light pollution filter is fine to leave on.
From there, I open the polar alignment tool and set the exposure — somewhere between 5 and 10 seconds. You don’t want to go much longer because the mount isn’t tracking yet, and longer exposures risk star trails that confuse the solver.
The tool captures three images, rotating roughly 15 degrees between each one — about 30 degrees of total rotation. It plate-solves each frame and uses the results to calculate your alignment error, broken down into two axes: left/right (azimuth) and up/down (altitude). You get specific error values for each.
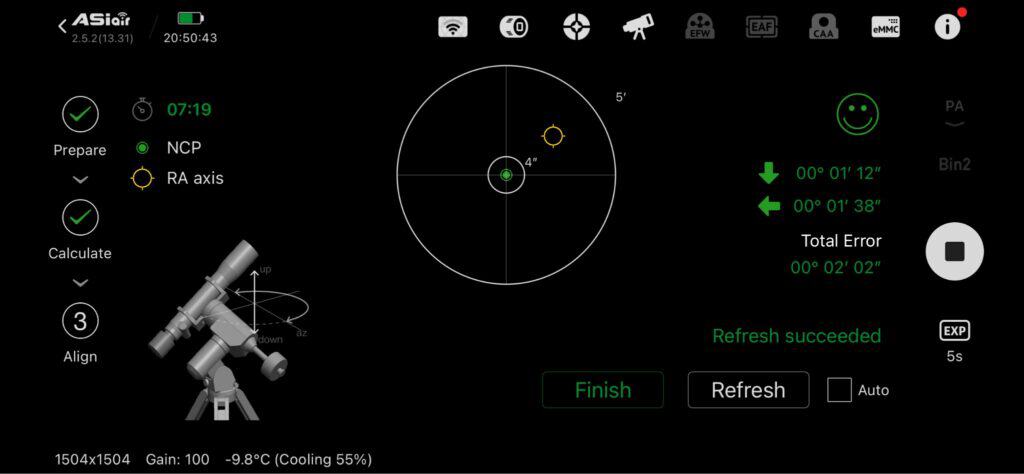
Then it’s hands-on. Adjust the mount’s azimuth and altitude knobs to bring those error values down, have the tool recalculate, and repeat. The ASIAir recommends getting total error below 5 arc-seconds. I aim for under 2 arc-seconds combined when I can, though that level of precision isn’t always necessary depending on what I’m shooting and how long my exposures are.
Start to finish, the process takes me 5 to 10 minutes on a typical night. If the rig was left out from a previous session and is already close, it’s even faster. A complete beginner should be under 15 minutes.
Tips That Save You Time
The first few times I did this, it took longer than it needed to. Most of that was me learning which knobs moved which axis and how the plate-solver’s error values corresponded to physical adjustments on the mount. That connection isn’t intuitive at first.
A few things that helped:
Get familiar with your mount’s adjustment knobs before you’re standing outside in the dark. Know which one controls azimuth and which controls altitude. Know which direction each one moves. This sounds basic, but fumbling with it under the stars while watching error values jump around is frustrating.
Work one axis at a time. Get azimuth close, then altitude, then fine-tune both together. Trying to adjust both simultaneously — especially early on — usually means overcorrecting one while chasing the other.
Once you’re in a low error range, switch to micro adjustments. When your total error is already under 10 arc-seconds, big knob movements will send you flying past the target and back again. Small, deliberate turns. Patience pays off here more than speed.
The Cost Conversation
Plate-solving polar alignment does come with an investment. You’ll likely need a go-to mount — I’m not aware of another reliable method for aligning without Polaris that doesn’t involve plate solving, and plate solving generally requires the mount to have motorized positioning. That’s worth factoring into your budget from the start if you know your imaging location has an obstructed north view. I’ve broken down what that actually costs, tier by tier, in my astrophotography budget guide — including the tracker I tried first that didn’t solve this exact problem.
On the controller side, the ASIAir is what I use, but it’s not the only option. Open-source plate-solving solutions exist that could work on a tighter budget. The ASIAir’s value for me extends well beyond polar alignment — it handles target finding, image framing, guide calibration, autorun sequences, and real-time image preview. That last one sounds minor, but catching a problem mid-session instead of discovering it the next morning while processing is a genuine quality-of-life upgrade.
Here’s the honest take: if you’re imaging from a constrained location, your setup may cost a little more than someone with wide-open dark skies and a clear view of Polaris. You’re solving a problem they don’t have. There’s nothing wrong with that. If you’re weighing where to put your budget, I broke down how I think about upgrade decisions. The extra investment buys you the ability to image from home on any clear night — and over time, the convenience and consistency more than pay for themselves.
Final Thoughts
Polar alignment is one of those steps that sounds intimidating until you’ve done it a few times. And the Polaris assumption makes it sound impossible if your sky is blocked. Neither of those things is true.
Don’t expect perfection on your first night. Like everything else in this hobby, polar alignment is a skill that improves with repetition. Your first attempt might take 20 minutes and land at 5 arc-seconds of error. A few sessions later, you’ll be under 2 in half the time without thinking about it.
Once polar alignment feels routine, it becomes just one step in a larger session flow.
Your constraints don’t disqualify you. They just change which tools you reach for. Polar alignment is one more problem with a solution — and plate solving is how you get there.
Tagged
In This Post
Current Setup
Equipment links are affiliate links – they help support this site at no cost to you.