
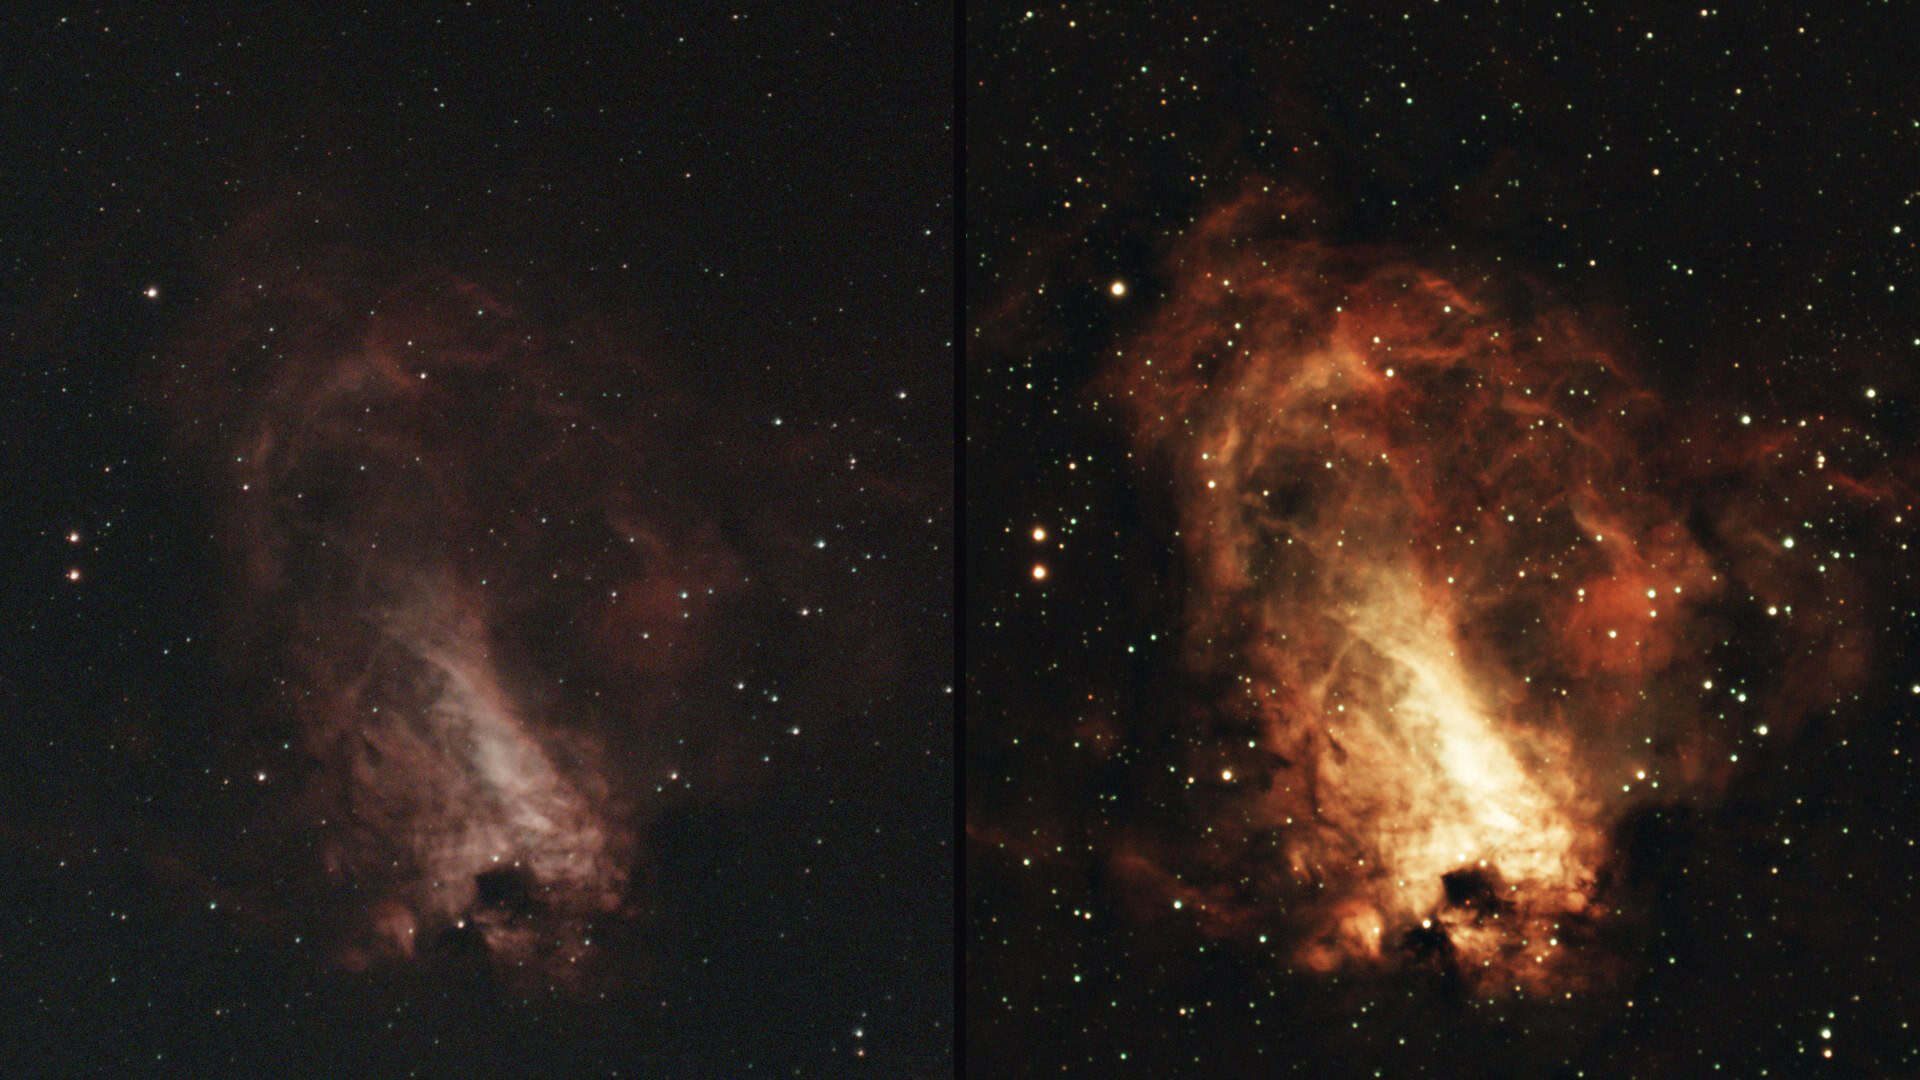
If you’ve ever looked up your location on a light pollution map and watched it come back solid white, you know the feeling. Bortle 9. The brightest sky on the scale. That’s what I image under in Florida, and early on it made me wonder which targets were even worth a clear night.
Most “best targets this month” lists don’t help much. They’re usually written with a dark sky in mind, and they rarely tell you whether a target will actually come through the glow over your city.
Here’s what about a year of imaging from a backyard with trees on two sides and a house blocking part of the south has taught me: there’s no version of “real” astrophotography that your sky locks you out of. Taking images of the night sky is astrophotography, plain and simple. A bright sky just means you have to be more intentional about what you shoot and when you shoot it.
A good target for light-polluted skies has high surface brightness (its light is packed into a small area instead of spread thin), fits your focal length and your rig, gives off light your filter can isolate, and sits well away from the moon on the night you shoot it. Light pollution doesn’t rule targets out. It changes which ones will make the most of your night.
Let’s dive into what actually makes a target work under a bright sky, and how to pick one before you commit a clear night to it.
There’s No Such Thing as a “Light-Polluted Target”
With the filters available today, I don’t think any target is truly off limits because of light pollution. You’ll see lists that sort objects into “city-friendly” and “dark sky only,” but that line is a lot blurrier than it looks.
That doesn’t mean your results will match a dark site. They won’t. Your colors will be different, your exposure times will run longer, and the image will carry the fingerprint of the sky it was taken under. Even when you filter out the outside light, you naturally lose some data, because blocking light is exactly what a filter does.
Gear can’t give you a dark sky. What it can do is make a target imageable from the sky you have.
So instead of asking “can I image this from here?” try asking “what would it take to image this from here?” Sometimes the answer is a filter. Sometimes it’s more integration time. Sometimes it’s simply a different night. The rest of this post is about making those calls.
Surface Brightness Matters More Than Total Brightness
When I first started thinking about this question, my answer was simple: the brighter the target, the better. That’s only half right, and the half that’s wrong is the part that costs you clear nights.
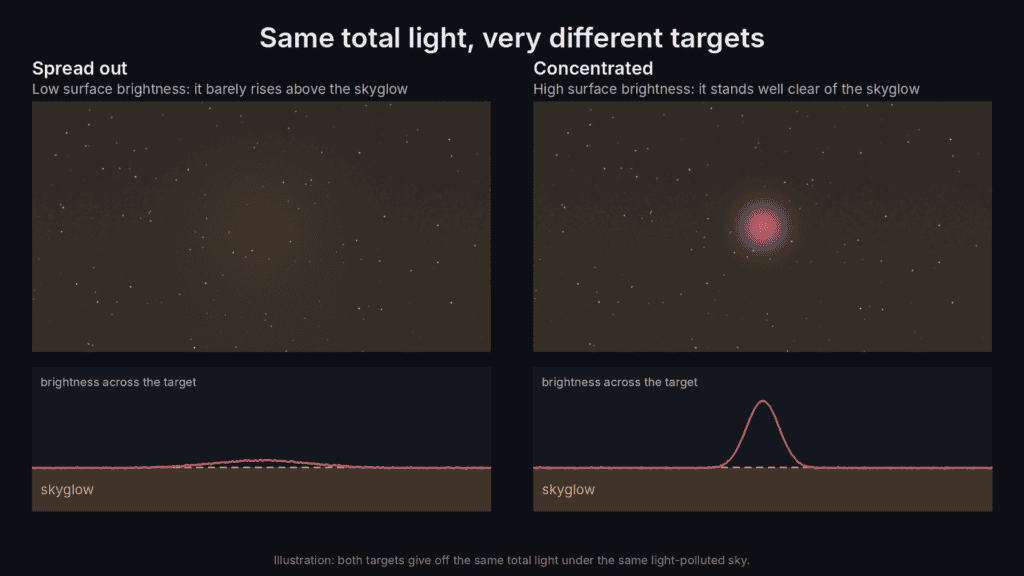
A large bright target and a small bright target are not the same thing. The large one may give off more total light, but that light is spread across a big patch of sky. What really matters under light pollution is surface brightness: how much light the target puts out per bit of sky it covers.
The Ring Nebula and the California Nebula are a good example. On paper, the California Nebula is actually brighter overall. But it stretches about 2.5 degrees across, roughly five full moons wide. The Ring is a tiny smudge about 1.4 arcminutes across. All of its light is packed into a few pixels on your sensor, which gives it a much higher surface brightness and makes it far easier to pull away from a bright sky background.
Here’s the rule I work from now: the higher a target’s surface brightness, the less total integration time you generally need to get a usable image under the same sky. Under Bortle 9, that’s often the difference between a target you can finish in one night and one that takes several.
Why Shorter Exposures Won’t Beat the Skyglow
This was my second correction, and it’s a common one. It feels like shorter exposures should help under a bright sky, since each frame picks up less light pollution. The catch is that each frame also picks up less of your target.
Light pollution builds up in your data no matter what you’re pointed at. Shortening your individual exposures lowers the target light and the background light at the same rate, so the contrast between them doesn’t improve.
Look at three ways to spend half an hour:
- 30 frames at 60 seconds
- 60 frames at 30 seconds
- 15 frames at 120 seconds
All three capture roughly the same 30 minutes of skyglow alongside the same 30 minutes of target. Sub length can’t fix contrast. Surface brightness and total integration time do that work.
Sub length still matters for other reasons. It decides whether your background and stars blow out, and it has to stay within what your mount can track cleanly. We’ll come back to that second point in a moment.
Match the Target to Your Focal Length and Your Goal
A target should fit your rig. That doesn’t mean you can’t shoot something just because your focal length isn’t what most people use for it. It means you go in knowing the final image will look different, and you plan for that.
The Rosette Nebula is the clearest example from my own imaging. I’ve shot it at 135mm with the Sony ZV-E10 and Rokinon, where it sits comfortably in frame with plenty of surrounding nebulosity. I’ve also shot it with the SV503 at around 475mm, and that’s basically the limit: the Rosette fills the frame. With the MK127 and its reducer at roughly 975mm, I wouldn’t get anywhere close to fitting its structure in.
Your goal for the session matters just as much. With the MK127 and reducer, the whole Eagle Nebula fits in frame, with the Pillars of Creation visible but small. Push to a long enough focal length and the Pillars fill the frame in detail, while the Eagle’s wider structure falls outside it. Neither result is wrong. They’re just different goals.
Here’s how I’d think about it at three common focal lengths:
| Focal length | Good fits | Why they work |
|---|---|---|
| 135mm (camera lens) | Orion Nebula, Lagoon and Trifid, Pleiades, Andromeda, Double Cluster | Large, bright, with recognizable features |
| ~475mm (SV503) | Orion Nebula, Lagoon Nebula, Dumbbell Nebula, M13, Andromeda’s core | Bright targets that fill a moderate frame |
| ~1000mm (MK127 with reducer) | Dumbbell Nebula, Great Hercules Cluster, Ring Nebula, Orion’s inner regions, Cigar Galaxy | Compact targets with concentrated light |
One thing to keep in mind: longer focal length scopes are typically slower than a fast camera lens like the Rokinon 135mm. A target that comes together quickly at 135mm may need noticeably more integration time at 1000mm.
Can Your Rig Handle It?
The other half of “fitting your rig” is what your setup can actually deliver on the night. Can you balance the mount well? Can you polar align accurately? Are you getting decent tracking?
All of that decides how long your individual exposures can run before stars start to trail or smear. Fainter targets naturally push you toward longer exposures and more total time. So before you commit to one, ask a simple question: can my rig handle that and still give me usable frames to stack?
I run a Star Adventurer GTi, and from my backyard the trees block Polaris entirely, so I rely on plate solving through the ASIAIR for polar alignment. That setup works well for me, but it has limits. A high surface brightness target that’s forgiving at shorter subs is a much safer bet than a faint one that needs everything to go perfectly.
Gear can’t make a shaky setup track a faint target. Picking a target that matches what your rig can do tonight is how you get frames you’ll actually keep.
How Filters Expand Your Target List
If you’re imaging under light pollution, a filter is one of the best investments you can make, because it changes which targets are realistic from your sky.
A dual-band filter like my SVBONY SV220 passes two narrow slices of light: hydrogen-alpha and OIII. That’s where emission nebulas glow brightest. Most of the rest of the visible spectrum, including most of what streetlights and skyglow put out, gets rejected. That makes emission nebulas the strongest candidates for a city sky.
Targets that don’t give off much emission light (galaxies, star clusters, and reflection nebulas) are a different story. A dual-band filter blocks most of what they emit. For those, a broadband light pollution filter like the Optolong L-Pro is the better tool. It trims some of the light pollution while letting the wider spectrum through.
Without a filter, you can still image plenty. You just need to be much more selective: favor high surface brightness targets, watch the moon closely, and expect your integration times to run longer.
You also don’t need a dedicated astro camera to start filtering. Even back on the ZV-E10, I used a dual-band filter mounted on the front of the Rokinon 135mm. The Sony’s short back focus made a front-mounted filter the practical option with what I could get my hands on, and it worked.
Planning Targets Around the Moon
A bright moon over a Bortle 9 sky doesn’t make a night unimageable. It changes which targets you should go after. The moon adds sky background the same way artificial light does, which lowers contrast (especially on fainter targets) and raises the integration time you need for a clean result.
Two things decide how much it matters: the moon’s phase and how far it sits from your target. Brighter, more concentrated targets are generally more forgiving.
Without Filters
| Moon phase | Good targets | Avoid |
|---|---|---|
| New | Fainter nebulas, galaxies, reflection and dark nebulas | Nothing in particular |
| Crescent | Galaxies, bright nebulas, clusters | Targets very close to the moon |
| Quarter | Bright nebulas, open and globular clusters | Low surface brightness targets |
| Gibbous | Globular clusters, bright planetary nebulas, double stars | Faint galaxies, reflection nebulas |
| Full | The moon itself, double stars, bright clusters, planets | Most faint, extended deep-sky targets |
You can split the roughly 29.5-day lunar cycle into rough windows:
- Days 1 to 7: fainter targets
- Days 8 to 14: brighter targets
- Days 15 to 21: the moon and clusters
- Days 22 to 29: your dark-sky window returns
Timing within the night helps too. A first quarter moon sets around midnight, leaving the second half of the night moonless. A last quarter moon rises around midnight, leaving your evening moonless. A full moon is generally up all night.
With Filters
Filters let you use more of the month. Here’s how the SV220 and L-Pro change the picture:
| Moon phase | Dual-band (SV220) | Broadband (L-Pro) |
|---|---|---|
| New, moon below horizon | Faint emission nebulas, OIII-rich targets | Galaxies, reflection nebulas, clusters |
| Crescent, moon up | Most bright emission nebulas | Bright galaxies and clusters, away from the moon |
| Quarter | Hydrogen-alpha-rich nebulas, brighter planetary nebulas | Bright clusters when the moon is distant |
| Gibbous | Hydrogen-alpha-dominant emission nebulas | Usually avoid faint broadband targets |
| Full | Bright hydrogen-alpha regions, away from the moon | Switch to the moon, planets, or bright stars |
On brighter moon nights, hydrogen-alpha-dominant targets like the Rosette, Eagle, and Lagoon hold up better than OIII-dominant targets like the Veil or most planetary nebulas. A dual-band filter like the SV220 changes which nights are practical for emission nebulas. A broadband filter like the L-Pro can improve contrast against some light pollution, but it won’t do much against the moon.
Vet Your Target Before You Commit the Night
When clear nights are limited, the worst thing you can do is spend half of one deciding what to shoot. I keep a target list so the goal is lined up before the night starts. It’s the single easiest way to get more out of a session.
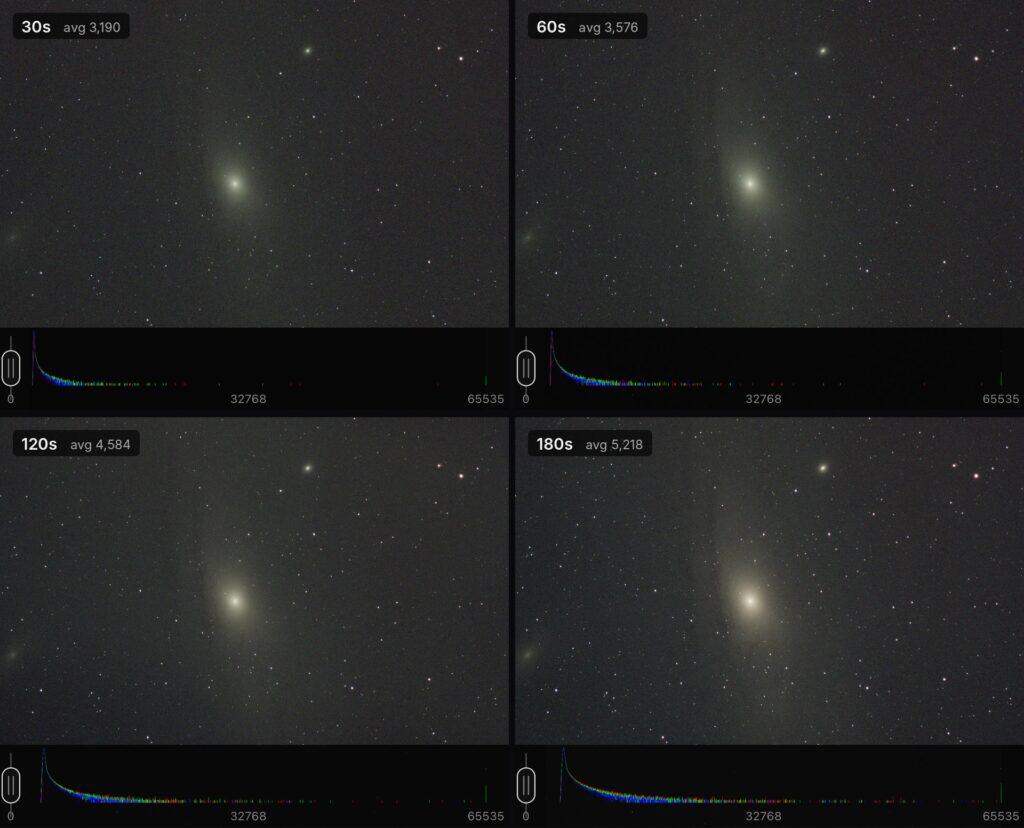
Once I’m set up, I take a few test images at different exposure times on the ASIAIR Plus and check the previews. That does two jobs.
First, it confirms I’m not overexposing. Recommended settings weren’t tested under your exact sky with your exact gear, so a quick check matters. If the settings hold up, those test frames can become part of the capture.
Second, it verifies framing at my focal length. Am I actually centered? Am I cropping part of the target? Is anything getting in the way? From my backyard, with trees to the north and west and a house to the south, that last question is a real one. The last thing you want is to leave the rig imaging all night and find out in the morning that a tree branch, or a light someone left on, crept into the frame.
There’s a practical side to target choice too. I keep my rig mostly assembled and ready to go, so part of my decision on any given night is simply what’s already put together. A target that fits the setup on the table often beats a better one that needs a full rebuild.
Good Starter Targets for Light-Polluted Skies
If you want a short list to start from, look no further than these. Each category leans on bright, concentrated light, which is exactly what holds up under a city sky.
- Bright emission nebulas: Orion Nebula, Lagoon Nebula, Omega Nebula. Strong hydrogen-alpha signal and a natural match for a dual-band filter.
- Globular clusters: M13, M3, M5, M22. Dense balls of stars with very high surface brightness, and forgiving even with the moon up.
- Bright planetary nebulas: Dumbbell Nebula (M27), Ring Nebula (M57), Eskimo Nebula (NGC 2392). Small, compact, and easy to separate from the sky background.
- Open clusters: Pleiades, Beehive. Bright stars that don’t need much integration time.
- Bright galaxies: Andromeda, Bode’s Galaxy, Cigar Galaxy. Pair these with a broadband filter and darker, moonless nights.
Which of these works best for you comes back to everything above: your focal length, your rig, your filter, and where the moon is that week.
Final Thoughts
A Bortle 9 rating doesn’t mean you can’t do astrophotography. There isn’t a “real” version of this hobby that your sky shuts you out of. If you’re taking images of the night sky, you’re doing astrophotography.
What a bright sky does ask of you is intention. Pick targets with high surface brightness, make sure they fit your focal length and your rig, use your filters where they help most, and plan around the moon instead of sitting it out.
If you want a first step, pick one bright, compact target from the starter list that’s well placed in your sky this week, line it up before the night, and take a few test frames. If you’re reading this in the fall, the Dumbbell Nebula is a great place to start. Your sky is just part of the puzzle.
Tagged
In This Post
Current Setup
Equipment links are affiliate links – they help support this site at no cost to you.